After a 350 mile break-in on the engine, I made the decision the car was ready for a cross country adventure and I drove the car 1250 miles to a youtube car builder gathering in Daytona, Florida. My wife just knew I was insane for even considering such a trip in a car that had barely proven it's roadworthyness. Being the optimist that I am, I decided that I had enough skill and knowledge to fix anything that might go wrong with the 40 year old Volkswagen and threw caution to the wind... Afterall, it wouldn't be an adventure if everything went right would it???
Sunday, June 16, 2013
First Drive
I've been neglecting the blog, so I figured I'd post up a couple vids from the last few months. The car is back on the road and I've put over 4000 miles on it in just over a month. I've been fixing minor issues and enjoying the spring weather.


Monday, June 25, 2012
Getting VERY Close
It's been awhile since I posted on the car because I've been putting most of my documentation efforts into my youtube channel: www.youtube.com/gregmporter
I have the hoods on, the wiring harness is 90% complete and I think I am just a couple weeks away from the first drive in decades. I'll try to post up some detail photos here in the next couple weeks.

I have the hoods on, the wiring harness is 90% complete and I think I am just a couple weeks away from the first drive in decades. I'll try to post up some detail photos here in the next couple weeks.

This is the car as of Saturday night
Monday, April 9, 2012
Wide Whites and Painted Wheels
My Coker Classic 2-1/4" white walls arrived this past week and I was able to get my wheels painted to match the body color of the car. I can't wait to get these mounted up and on the vehicle.
I did a 3 part series on how to paint your wheels the professional way. This is not as expensive as most people would think. It's about $50 for a quart sprayable of urethane basecoat and about $30-50 for the clearcoat. I used Matrix MPB (Matrix Premium Basecoat) Gecko Green Metallic for the color and MS-42 High Gloss Urethane Clearcoat. I bought the base and clear from http://www.anotheroptionpaintandbodysupply.com/
I did a 3 part series on how to paint your wheels the professional way. This is not as expensive as most people would think. It's about $50 for a quart sprayable of urethane basecoat and about $30-50 for the clearcoat. I used Matrix MPB (Matrix Premium Basecoat) Gecko Green Metallic for the color and MS-42 High Gloss Urethane Clearcoat. I bought the base and clear from http://www.anotheroptionpaintandbodysupply.com/

Wheel sitting on the new tire with hubcap
Sunday, December 4, 2011
Convertible top frame blasting and painting
I sandblasted the top frame this week. After that was done, I fabbed up the intermediate bow that was missing from the frame. Once that was welded in and operational I coated the frame with 2 coats of DP-90 then top coated with rattlebomb black. I think the DP will provide the durability, the rattle bomb was just a bit of UV protection for the DP.
I was also able to get the doors hung on the car. It feels like it's starting to come together.
I was also able to get the doors hung on the car. It feels like it's starting to come together.

Intermediate bow jigged up
 Doors on and top frame installed
Monday, November 28, 2011
Body Back on the Frame
My dad, my uncle Gordy, my friend Damon and my wife's uncle Scott came over after the rain let up on Saturday to lift the body back onto the chassis. The operation went almost too smooth. 5 minutes of rolling the car out and about 30 seconds of heavy lifting and the car was re-married to it's frame. I prepped the frame by using seam sealer to stick the pan gasket into place and cutting holes in the gasket with a razor blade. The pan bolts will probably go in and come out half a dozen times while we shave down the bushings on the front and back ends of the car. Hopefully the doors will fit correctly and the world will be a happy place once again.


Wednesday, November 23, 2011
Floor Pans are Bedlined
I stripped all the POR-15 off the floorpans last weekend. The stuff just doesn't hold up like you would expect it to. I have decided I will never use a single part paint on a car again. Also, I will never fall for the "you can paint right over the rust" snake oil pitch again. If you have rust on a car, you have to remove it!!!!!!!!! Just like weight loss, there is no magic bullet, no magic pill, no magic potion to point and click the rust away. It takes hard work, elbow grease and abrasives to remove unwanted corrosion.
I chose to use U-Pol Raptor liner on the pans since it has a hard surface with some texture to it. I was much happier with the texture on the pans vs the texture I got in the wheel wells. I was able to hold the gun back a bit further and I got very even coverage. I used a bit more hardner than directed so the material came out of the gun with a much smoother texture. It took 1 liter per coat to do the pans. I bought a 4 liter kit, so I still have 1/2 of the material left. I may spray the inner quarter panels and the rear luggage areas, I'm not sure yet.


I chose to use U-Pol Raptor liner on the pans since it has a hard surface with some texture to it. I was much happier with the texture on the pans vs the texture I got in the wheel wells. I was able to hold the gun back a bit further and I got very even coverage. I used a bit more hardner than directed so the material came out of the gun with a much smoother texture. It took 1 liter per coat to do the pans. I bought a 4 liter kit, so I still have 1/2 of the material left. I may spray the inner quarter panels and the rear luggage areas, I'm not sure yet.


Wednesday, October 26, 2011
Finally - Paint Day Arrives
I took a two week vacation from work so I could get the car painted. I hoped to have it prepped and ready to spray last Friday. I spent around 12 hours a day Thursday through Monday getting the car sanded to perfection. The nose and right fender both had hairline cracks in the primer right at the body lines. I wound up grinding out all the bodywork on the 3 inches both sides of the nose ridge to make sure whatever caused the primer failure was gone. That meant completely redo-ing the bodywork on the toughest part of the car in a day. As I was washing the car for the final time, I noticed the crack in the fender. It was about 1/8" long and barely noticeable, but still it needed to be sanded and fixed so it would not translate up through the paint.
The paint day was ridiculous. I started working at 5:30 a.m. emptying the garage and getting everything clean. After the cleaning my dad came over and helped me hang plastic, mask the car and get the lights set up. I started painting at 1:40 p.m. From the time I started painting I was non-stop busy. There were a couple quick water breaks, but that's it. I laid down sealer on everything, then started laying color. I base coated all the parts. Somehow I did not get the gun perfectly clean between sealer and basecoat. The first coat of base had trash from the gun splattered all over the left fender. A quick call to a hotrod builder in Arizona gave me the tools I needed to fix the troubles and continue the paintjob. I took a piece of 1500 grit and some grease and wax remover as a lubricant to sand out all the goobers. I would guess there were 25+ areas that I had to fix. After the next coat of base, you couldn't tell there were any problems.
I had issues with the hood, fuel filler lid and license plate light bar. All the parts that had been previously painted. It wasn't the existing paint it was just coincidence. A bug landed in the hood after the clear was down. I got runs in the base on the other two parts and had to sand them down to the sealer... It was a mess and I'll probably paint them again.
Yes, there are a couple sags and some orange peel in the paint, but all in all it looks really good.


The paint day was ridiculous. I started working at 5:30 a.m. emptying the garage and getting everything clean. After the cleaning my dad came over and helped me hang plastic, mask the car and get the lights set up. I started painting at 1:40 p.m. From the time I started painting I was non-stop busy. There were a couple quick water breaks, but that's it. I laid down sealer on everything, then started laying color. I base coated all the parts. Somehow I did not get the gun perfectly clean between sealer and basecoat. The first coat of base had trash from the gun splattered all over the left fender. A quick call to a hotrod builder in Arizona gave me the tools I needed to fix the troubles and continue the paintjob. I took a piece of 1500 grit and some grease and wax remover as a lubricant to sand out all the goobers. I would guess there were 25+ areas that I had to fix. After the next coat of base, you couldn't tell there were any problems.
I had issues with the hood, fuel filler lid and license plate light bar. All the parts that had been previously painted. It wasn't the existing paint it was just coincidence. A bug landed in the hood after the clear was down. I got runs in the base on the other two parts and had to sand them down to the sealer... It was a mess and I'll probably paint them again.
Yes, there are a couple sags and some orange peel in the paint, but all in all it looks really good.

Car in paint and outside

Now that I see it, I am really glad I filled in the grills
Monday, October 3, 2011
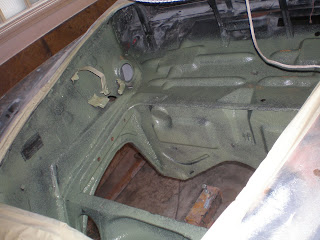
Karmann Ghia Engine Bay Painted
It's been awhile since I posted, again, most days I post vids on youtube. I gave the whole car it's initial 3 coats of primer and I have it all block sanded down. I glazed a few spots and I am ready to do my second prime. I am waiting on some materials, hopefully I'll have everything this week and be able to shoot the Matrix MP3 HS. Once I shoot it, I'll have to let it sit for about a week to cure before I can sand on it.
I did, however, get the engine bay sanded, primed and painted yesterday. It took all day to finish the bodywork, sand all the fiddly bits, clean and tack. I wrapped up my cleaning around 10:30 pm... That's a bit late for a work night, but it was totally worth it. I did get a couple small sags under the accent lines on the wheel tubs, but hey, it's an engine bay, so I'm not worried about them. I'm sure I could polish them out, but I doubt I will.
I did, however, get the engine bay sanded, primed and painted yesterday. It took all day to finish the bodywork, sand all the fiddly bits, clean and tack. I wrapped up my cleaning around 10:30 pm... That's a bit late for a work night, but it was totally worth it. I did get a couple small sags under the accent lines on the wheel tubs, but hey, it's an engine bay, so I'm not worried about them. I'm sure I could polish them out, but I doubt I will.

Engine bay painted under the lights
 In the sun
Monday, August 1, 2011
Front End primed
This feels like groundhog day. I was at this stage back in November before I completely striped the shell AGAIN... Now all the bodywork is done on the front end and it has epoxy and high build sprayed on again.
Sorry for the lack of updates. I put videos on youtube with progress about every week. It's an easy format for me to show progress and ask questions of guys who have a ton of experience.
I am 100% complete with the bottom of the car as well. I put on the second coat of tintable U-Pol Raptor bed liner and I couldn't be happier with the results. The car will be sitting in the 100+degree heat for the next few days.


Sorry for the lack of updates. I put videos on youtube with progress about every week. It's an easy format for me to show progress and ask questions of guys who have a ton of experience.
I am 100% complete with the bottom of the car as well. I put on the second coat of tintable U-Pol Raptor bed liner and I couldn't be happier with the results. The car will be sitting in the 100+degree heat for the next few days.


Sunday, June 26, 2011
Wheel Well Painting - U Pol Raptor Liner
I sprayed on the first couple sections of U-Pol Raptor tintable bedliner on my wheel wells today. I am happy with the look and feel of the stuff. It went on very easy. My first step was the driver's fender well, then I did the luggage area and firewall. I decided after the first quart that I don't need to worry about 100% coverage on the first coat, just get the product on. That said, I think I'll put 2 coats on everything and that will take 2 kits to make that happen.
 Driver's Side fender well
 First Coat on Luggage Compartment
 Driver's Side fender well
 First Coat on Luggage Compartment
Saturday, June 25, 2011
Car on Rotisserie
It's been awhile since I've updated the blog. I've been posting lots of videos to Youtube since it seems to be a quicker and more descriptive vehicle for showing detail about the restoration. That said, I took a week off work to push the project ahead and was able to bodywork the car from the back of the doors forward. I got the front bumber brackets mounted, I fit the rear decklid, gapped the doors, finished tubbing out the rear wheel wells, finished building my rotisserie and straightend out my torsion bar access holes.
This week I got the car ready to put onto the rotisserie. I did the whole operation by myself with an engine hoist. I was nervous about it, but it could not have gone smoother. I wrapped a chain around the two inspection hole for the steering boxes, through a square tube and put a cross brace at the back of the doors under the convertible stiffner panel that attaches around the back of the striker. The car lifted like a dream and the rotisserie fit like a glove. All the measurements I made for the rotisserie were done with the body on, so they weren't perfect by any means. I was actually surprised when I was only off about 3/8" from front to back. The car swings really heavy at the bottom of the swing and the car clears the fixture by about 1"!!! I couldn't be happier with it.
I'm hoping to get the front wheel wells coated this weekend, but I'm not sure I can get everything prepped and coated... We'll see.
This week I got the car ready to put onto the rotisserie. I did the whole operation by myself with an engine hoist. I was nervous about it, but it could not have gone smoother. I wrapped a chain around the two inspection hole for the steering boxes, through a square tube and put a cross brace at the back of the doors under the convertible stiffner panel that attaches around the back of the striker. The car lifted like a dream and the rotisserie fit like a glove. All the measurements I made for the rotisserie were done with the body on, so they weren't perfect by any means. I was actually surprised when I was only off about 3/8" from front to back. The car swings really heavy at the bottom of the swing and the car clears the fixture by about 1"!!! I couldn't be happier with it.
I'm hoping to get the front wheel wells coated this weekend, but I'm not sure I can get everything prepped and coated... We'll see.

Car on the hoist rolling across the garage

Car on the rotisserie fully rotated
Sunday, April 3, 2011
Blocking and some paint
It's nice to have help once in awhile... My wife's uncle Scott came over to the garage for a couple hours to help knock down bondo, strip off the JP-205, push out a few dents and drain a couple beers (buying beer beats the hell out of paying a $50/hr shop rate). It seemed like we were able to do 3x the work with only two guys.
While Scott was sanding the doors and fenders, I was busy working on the front hood, fuel filler lid and license plate light/decklid handle. I found more panel damage from the sandblasting and made a promise that I would never again sand blast a panel with structure behind it. After some block sanding, it was evident the hood had low spots around the perimeter where the structure pushed while it was being blasted. The spots weren't deep, but still required a lot of work to smooth out. I had one spot that was close and I wanted it to be perfect, so I stuck the hood in the e-wheel for some smoothing... BAD IDEA! I accidently went too close to the edge and pinched the structure below into the panel and created some deep grooves... I wound up having to fill in the area rather than metal work it.
 Unkie Scott grinding out some filler
  The bodywork on the low spots
  The hood after a couple coats of epoxy primer
  4 coats of Matrix MP3-HS Urethane Primer and a guide coat
 Thursday, March 31, 2011
Paint Supplies Arrive
I've been collecting body and paint supplies over the last 4-5 months. When I can find a good deal on the internet, I buy it... I've finally found a bunch of good deals and I have assembled almost everything I need. I had to wait for warm weather because my paint was shipped in from the East coast and I didn't want it to freeze on the way here.
I ordered a pint of color - VW Gecko Green Metallic - in PPG's Deltron 2000 DBC. I haven't seen the color in real life (only in photos) so I figured I'd order a small amount and shoot the hood or something small to see if I like the color. I'm also going to use the test panels to the upholstry folks so I can figure out what materials and colors will go with the paint.
I did a quick drop of paint onto the fuel lid... I like what I see. I'll take it out into the sun tomorrow to get a better idea of the color. I'd like to paint the hood this weekend, but I seriously doubt I'll have enough time to get everything prepped and painted before it's time to go to work on Monday morning.

All my new supplies: Evercoat, Deltron DBC, DC3000 Clear, MP3-HS 2K high build primer, norton 80 and 180 grit PSA, U-Pol Raptor Tintable bedliner (for the wheel wells), filters and sticks.
I ordered a pint of color - VW Gecko Green Metallic - in PPG's Deltron 2000 DBC. I haven't seen the color in real life (only in photos) so I figured I'd order a small amount and shoot the hood or something small to see if I like the color. I'm also going to use the test panels to the upholstry folks so I can figure out what materials and colors will go with the paint.
I did a quick drop of paint onto the fuel lid... I like what I see. I'll take it out into the sun tomorrow to get a better idea of the color. I'd like to paint the hood this weekend, but I seriously doubt I'll have enough time to get everything prepped and painted before it's time to go to work on Monday morning.

All my new supplies: Evercoat, Deltron DBC, DC3000 Clear, MP3-HS 2K high build primer, norton 80 and 180 grit PSA, U-Pol Raptor Tintable bedliner (for the wheel wells), filters and sticks.
Sunday, March 13, 2011
Beginning Bodywork
After a LONG time away from the car, I started the bodywork this weekend. Last time I touched the car, I was squirting on a gallon of polyester primer in hopes it would save me some headache when it came to surfacing the car out.
Once again, I have learned there are no shortcuts or easy ways out. I began my weekend by visiting my friend Brian. He has built about half a dozen cars in the time I've been working on the Ghia. I asked his advice on block sanding and prepping the car. In his explanation, he gave me some great pointers and sent me home with a box of long blocks to try out. I already have a 16" body file, an air file and a couple small sized blocks. Brian lent me a flexible 12" block, a 24" block and a couple small pieces of flexible rubber.
The first thing I did when I started to work was to spray the car with a guidecoat of black rattlebomb paint. After the paint was dry, I went to town on the rear quarter with the long block. I figured I would have a lot of paint to sand through before I'd hit the epoxy primer... WRONG!!! I hit the primer and went down to the metal all over the place. Judging from all the low and high spots in the guidecoat, you'd think the car had been in a hail storm. HOLY COW!
I figured I'd bust out the filler and start filling the low spots, well after a couple hours of filling lows and sanding through primer, I figured I'd stop and start asking questions... I'm wondering if I am doing something wrong, so I am halting operations until I can talk to someone who can either confirm I am doing itright or can tell me what I am doing wrong.


Once again, I have learned there are no shortcuts or easy ways out. I began my weekend by visiting my friend Brian. He has built about half a dozen cars in the time I've been working on the Ghia. I asked his advice on block sanding and prepping the car. In his explanation, he gave me some great pointers and sent me home with a box of long blocks to try out. I already have a 16" body file, an air file and a couple small sized blocks. Brian lent me a flexible 12" block, a 24" block and a couple small pieces of flexible rubber.
The first thing I did when I started to work was to spray the car with a guidecoat of black rattlebomb paint. After the paint was dry, I went to town on the rear quarter with the long block. I figured I would have a lot of paint to sand through before I'd hit the epoxy primer... WRONG!!! I hit the primer and went down to the metal all over the place. Judging from all the low and high spots in the guidecoat, you'd think the car had been in a hail storm. HOLY COW!
I figured I'd bust out the filler and start filling the low spots, well after a couple hours of filling lows and sanding through primer, I figured I'd stop and start asking questions... I'm wondering if I am doing something wrong, so I am halting operations until I can talk to someone who can either confirm I am doing itright or can tell me what I am doing wrong.


Sunday, October 31, 2010
Polyester Filler/Surfacer Applied
My last official day of vacation and I checked off the last item on my todo list! I got the car coated in PPG JP205 polyester primer/surfacer. I don't have any experiece with this stuff and it was a bit of a challenge setting up my gun to get it to shoot properly. It is THICK stuff. I bought a gallon and I was planning to use about 3/4 of it. I managed to put the stir stick into the gallon can AFTER I stirred some hardener into a batch in a mixing cup. After that, I figured I better use the whole gallon or it would probably be rock hard the next time I went to use it.
It took me about 8 trips around the car to use up the whole gallon. I think I had the gun set too thin to start with, so I thickend up the mix and I was draining guns in about 10 minutes. I also shot both doors and the deck lid. I was going to shoot the hood too, but I wrapped the edges in packing tape a year or so ago and when I went to take it off, it left adheasive all over the place. I tried to wipe it off with thinner and cleaner, then tried to sand it off and went right through the epoxy... The hood is about 100% so it shouldn't need a bunch of primer/surfacer. I'll probably shoot it with a 2K primer later on.
The whole house stinks like bondo. It's 50 degrees and we have all the windows open. Hopefully it burns off soon!!!
 Car in JP 205
 Doors in polyester
It took me about 8 trips around the car to use up the whole gallon. I think I had the gun set too thin to start with, so I thickend up the mix and I was draining guns in about 10 minutes. I also shot both doors and the deck lid. I was going to shoot the hood too, but I wrapped the edges in packing tape a year or so ago and when I went to take it off, it left adheasive all over the place. I tried to wipe it off with thinner and cleaner, then tried to sand it off and went right through the epoxy... The hood is about 100% so it shouldn't need a bunch of primer/surfacer. I'll probably shoot it with a 2K primer later on.
The whole house stinks like bondo. It's 50 degrees and we have all the windows open. Hopefully it burns off soon!!!
 Car in JP 205
 Doors in polyester
Saturday, October 30, 2010
Epoxy is on
This was probably the most stressful day in the entire restoration. Paint is always a bit nerve racking for me, but this was over the top. I had a bit of welding and grinding to finish up this morning before I moved to painting.
I hit Home Depot at the crack of 8am for painter's plastic, steel wool, and a couple small items. The plastic I bought was a roll of .35 mil 12'x400' for $24. I also dropped by my dad's house to pick up a box fan. I added a handful of thumb tacks and that was my paint booth for the day. Sorry, I didn't take picks, but it's in my video.
After the Depot, I hit the final wheel arch welds and ground them down. Wouldn't you know it, my welder was very tempermental, and almost pooped on me durning my last few welds. Thankfully, it held out. I was done with the welding and grinding about noon.
I started to DA the entire car thinking it would take about 30 minutes... WOW, that's a huge job. I spent about 2-1/2 hours and went though about 15 discs of 80 grit. When I was done the car looked great. I wire brushed the weatherstrip channels and all the weld beads to make sure I got all the surface rust that was on the car.
After the DA, I hit the whole car with "Pete's Pickle Juice" and steel wool. Pete from Southwest Rod and Custom said that you can buy the metal prep from PPG for about $25 a gallon or you can buy a $2 bottle of white vinegar and add it to water... It's the same thing except for the blue food coloring. The vinegar turns spots on the car a gold color. I suspect it's some sort of impurity, I don't know. I wiped one fender at a time, then rinsed it off with a hose, then dried with paper towels, then hit it with the hose again. I've never done that step before, so I hope I did it right...
Once the car was hosed down and dry, I hit it with Final Prep (wax and grease remover) from Carrol Brothers. It's the same thing as PPG DX 330, but a heck of a lot cheaper. The panels were so clean they actually squeeked as I dragged the Torx paper towels over them.
After the final prep, I pulled the car into the garage and began building the cacoon out of the painter's plastic. Once that was done, I poured a bucket of water on the floor and started the box fan. Then it was time to start mixing paint.
I had two quarts of 402LF and one was no longer a liquid. Apparently, that stuff has a shelf life... The one that was still liquid, was amber in color, which happens with age. I used some DTV reducer and the mix was 2 parts dp90, 1 part 402, .5 parts DTV. This makes a fairly thin sealer that's easier to spray than straight DP. I used a Devilbis Starting Line HVLP gun. This was the first time I really put this gun through the paces.
Once the paint was in the gun (I forgot to strain it, I'll cover that later...) I turned the pressure regulator/valve at the gun to 0, pulled the trigger and slowly opened the regulator until the gun was about 10 PSI. I used a small, round pattern since that seemed to give me a lot of control. The gun performed like a dream! I couldn't believe I was laying paint down that smooth. I did get a couple sags because I lost my concentration for a bit, but all-in-all it looks good. When I got to the end of the first gun full, the paint started to spatter a bit and I couldn't figure out why. It only lasted a little bit and it was time to refill. I refilled and the paint was back to smooth again. At the end of the gun, same spattering... Duh, the paint wasn't strained through the filter... I won't make that mistake again.
I finished cleaning up from the primer/sealer at 7:30p.m.
Things I learned... Give yourself PLENTY of room to work. My cacoon was too small. I needed 2'-3' more room on the sides of the car than what I had. Also, I tripped over the platic in a few places and it came down. There was almost no overspray with the HVLP gun, so not having the plastic wasn't a huge issue. I barely squeezed this job in today and I was hoping to get polyester surfacer on as well... I didn't give myself anywhere near enough time to get everything done, so I was rushed and frustrated by the end of the job. The car is supposed to be a fun project and the stress level today did not make it any fun at all. The results are kick ass though!!!
 Rear of the car
 Front of car
 Nose and doors
I hit Home Depot at the crack of 8am for painter's plastic, steel wool, and a couple small items. The plastic I bought was a roll of .35 mil 12'x400' for $24. I also dropped by my dad's house to pick up a box fan. I added a handful of thumb tacks and that was my paint booth for the day. Sorry, I didn't take picks, but it's in my video.
After the Depot, I hit the final wheel arch welds and ground them down. Wouldn't you know it, my welder was very tempermental, and almost pooped on me durning my last few welds. Thankfully, it held out. I was done with the welding and grinding about noon.
I started to DA the entire car thinking it would take about 30 minutes... WOW, that's a huge job. I spent about 2-1/2 hours and went though about 15 discs of 80 grit. When I was done the car looked great. I wire brushed the weatherstrip channels and all the weld beads to make sure I got all the surface rust that was on the car.
After the DA, I hit the whole car with "Pete's Pickle Juice" and steel wool. Pete from Southwest Rod and Custom said that you can buy the metal prep from PPG for about $25 a gallon or you can buy a $2 bottle of white vinegar and add it to water... It's the same thing except for the blue food coloring. The vinegar turns spots on the car a gold color. I suspect it's some sort of impurity, I don't know. I wiped one fender at a time, then rinsed it off with a hose, then dried with paper towels, then hit it with the hose again. I've never done that step before, so I hope I did it right...
Once the car was hosed down and dry, I hit it with Final Prep (wax and grease remover) from Carrol Brothers. It's the same thing as PPG DX 330, but a heck of a lot cheaper. The panels were so clean they actually squeeked as I dragged the Torx paper towels over them.
After the final prep, I pulled the car into the garage and began building the cacoon out of the painter's plastic. Once that was done, I poured a bucket of water on the floor and started the box fan. Then it was time to start mixing paint.
I had two quarts of 402LF and one was no longer a liquid. Apparently, that stuff has a shelf life... The one that was still liquid, was amber in color, which happens with age. I used some DTV reducer and the mix was 2 parts dp90, 1 part 402, .5 parts DTV. This makes a fairly thin sealer that's easier to spray than straight DP. I used a Devilbis Starting Line HVLP gun. This was the first time I really put this gun through the paces.
Once the paint was in the gun (I forgot to strain it, I'll cover that later...) I turned the pressure regulator/valve at the gun to 0, pulled the trigger and slowly opened the regulator until the gun was about 10 PSI. I used a small, round pattern since that seemed to give me a lot of control. The gun performed like a dream! I couldn't believe I was laying paint down that smooth. I did get a couple sags because I lost my concentration for a bit, but all-in-all it looks good. When I got to the end of the first gun full, the paint started to spatter a bit and I couldn't figure out why. It only lasted a little bit and it was time to refill. I refilled and the paint was back to smooth again. At the end of the gun, same spattering... Duh, the paint wasn't strained through the filter... I won't make that mistake again.
I finished cleaning up from the primer/sealer at 7:30p.m.
Things I learned... Give yourself PLENTY of room to work. My cacoon was too small. I needed 2'-3' more room on the sides of the car than what I had. Also, I tripped over the platic in a few places and it came down. There was almost no overspray with the HVLP gun, so not having the plastic wasn't a huge issue. I barely squeezed this job in today and I was hoping to get polyester surfacer on as well... I didn't give myself anywhere near enough time to get everything done, so I was rushed and frustrated by the end of the job. The car is supposed to be a fun project and the stress level today did not make it any fun at all. The results are kick ass though!!!
 Rear of the car
 Front of car
 Nose and doors
Friday, October 29, 2010
Rear Hood gap and apron
BIG DAY TODAY!!! I finished the bodywork on the exterior of the car today! I think I am ready to squirt epoxy tomorrow. I have a few little items to finish up before I do that, but the bulk of the work is complete. Today I welded in the new apron from Mike at House of Ghia. He made special arrangements to have it drop shipped to me from the Ventura Warehouse Group (I think that is KGP&R). It was one of the best quality repops I have received on this project.
I finally conceeded to cutting the right rear quarter at the decklid gap. I really had a bad feeling about this, because the quarter was original and uncut, but in the end, it didn't fit, so something was wrong. After I got everything stitched up, I feel it was probably the best decision I made on the restoration so far. The fit is fantastic now!
Tomorrow I paint!!!
 Marking out the lines for surgery

Quarter panel cut and ready to modify
 Quarter with nice even gap and everything welded in place
 Apron in place and patch fabbed up for the last hole left on the car
 Last piece of the body welded into place and ground down.
I finally conceeded to cutting the right rear quarter at the decklid gap. I really had a bad feeling about this, because the quarter was original and uncut, but in the end, it didn't fit, so something was wrong. After I got everything stitched up, I feel it was probably the best decision I made on the restoration so far. The fit is fantastic now!
Tomorrow I paint!!!
 Marking out the lines for surgery
Quarter panel cut and ready to modify
 Quarter with nice even gap and everything welded in place
 Apron in place and patch fabbed up for the last hole left on the car
 Last piece of the body welded into place and ground down.
Wednesday, October 27, 2010
Left Rocker Complete
Spent another day of vacation banging out work on the Karmann Ghia. Today's menu had the left quarter panel lower front section as the blue plate. I spent about 4 hours getting it fit up and welded in. After it was complete, I spent 4 more hours grinding down both quarter patches and stripping some remaining paint from the door jambs, windshield frame and convertible top cable tunnel (the strip around the outside back of the passenger compartment.) All in all I made good progress.
My rear apron did not arrive from House of Ghia today. I spoke with Mike, the owner, last week and he said they were out of stock and he would have one drop shipped from the manufacturer and it was supposed to be here today... Hopefully it will arrive tomorrow or my final weekend of 70 degree temps may pass me by without getting paint on the car. If that happens, I'll have to punt and come up with a backup plan... I don't think the epoxy needs 70 degrees to cure but the polyester surfacer does for sure. I can always fire up the kerosene heater while I'm laying down the surfacer.


My rear apron did not arrive from House of Ghia today. I spoke with Mike, the owner, last week and he said they were out of stock and he would have one drop shipped from the manufacturer and it was supposed to be here today... Hopefully it will arrive tomorrow or my final weekend of 70 degree temps may pass me by without getting paint on the car. If that happens, I'll have to punt and come up with a backup plan... I don't think the epoxy needs 70 degrees to cure but the polyester surfacer does for sure. I can always fire up the kerosene heater while I'm laying down the surfacer.

Right side quarter patch ground down

Left side patch welded in and dressed
Sunday, October 24, 2010
Right Side Rocker Complete
I got a couple big projects wrapped up today. First I painted the inner fenders with POR-15. That was a much bigger job than I thought it would be. I had to really plan out the attack so I could work myself inside the fenders without getting into areas with wet paint. After a couple hours of squeezing in and out of the fenders I have a pretty good looking set of innards. All I have left to do in front of the doors is a bit of grinding in the luggage compartment and mounting the bumper brackets and tubes.
I broke screw driver #3 trying to remove the last two screws from the passenger door hinge. Thankfully this one had a life time warrenty and I returned it to the Home Depot for a new one. I hit the screws with 2 thick coats of PB Blaster, I guess I'll pull out the torch and see what I can do. I am just afraid of melting a good hinge. I believe they are aluminum, so melting is a big concern.
After I ate lunch and watched the final quarter of the Chiefs game, I set out to weld in the passenger's side front section of the lower rear quarter. These patch panels are notorious for their ill fit. It took just about 5 hours to cut, fit, bully and weld the panel in place. It was about 9 p.m. by the time I cleaned up all the tools, so I did not get the welds ground down. I used SEM brushable weld through primer on all the areas to be welded. I still don't like the way this product makes the welds spatter and the heat that you have to use to burn through it. It's much better than not putting anything there, but I still don't like it. Since it was in the rocker section and I can't get in there to paint AFTER I weld, I don't really have a choice. I have to return to the office tomorrow, and I have to spend Tuesday away from the car as well. Hopefully I can pick up the pace on Wednesday and get a few more items checked off the list so I can get the car in epoxy this weekend.
 bumper brackets painted up with POR-15
 Bumper tubes. One in gloss black and the other in semi-gloss black. I like the semi-gloss much better.
 Lower quarter section welded in

Broken screw driver
I broke screw driver #3 trying to remove the last two screws from the passenger door hinge. Thankfully this one had a life time warrenty and I returned it to the Home Depot for a new one. I hit the screws with 2 thick coats of PB Blaster, I guess I'll pull out the torch and see what I can do. I am just afraid of melting a good hinge. I believe they are aluminum, so melting is a big concern.
After I ate lunch and watched the final quarter of the Chiefs game, I set out to weld in the passenger's side front section of the lower rear quarter. These patch panels are notorious for their ill fit. It took just about 5 hours to cut, fit, bully and weld the panel in place. It was about 9 p.m. by the time I cleaned up all the tools, so I did not get the welds ground down. I used SEM brushable weld through primer on all the areas to be welded. I still don't like the way this product makes the welds spatter and the heat that you have to use to burn through it. It's much better than not putting anything there, but I still don't like it. Since it was in the rocker section and I can't get in there to paint AFTER I weld, I don't really have a choice. I have to return to the office tomorrow, and I have to spend Tuesday away from the car as well. Hopefully I can pick up the pace on Wednesday and get a few more items checked off the list so I can get the car in epoxy this weekend.
 bumper brackets painted up with POR-15
 Bumper tubes. One in gloss black and the other in semi-gloss black. I like the semi-gloss much better.
 Lower quarter section welded in
Broken screw driver
Saturday, October 23, 2010
Time for a fake drive
It's been a long week of work and I deviated from the plan a little bit today. I painted up the "new" bumper brackets, bracket tubes, inner quarter patches, door edges and door insides so I while the paint was drying I had an hour or so to do some items that were not on the "do before epoxy primer" list. This last week (in between checking off items), I've been hitting the drivers seat frame with PB blaster to loosen up the controls so I could install the seat and sit in my car for the first time in 15 years. Well, in my little bit of extra time, I set the the seat in place, dug out the steering wheel and column and set up to take a picture of a full grown man in a little vintage VW!!! Hopefully I can finish up the restoration and drive it for real before I loose the rest of my hair!
I'll have more progress pics tomorrow.

I'll have more progress pics tomorrow.

Subscribe to:
Posts (Atom)

