Sunday, October 31, 2010

Polyester Filler/Surfacer Applied

My last official day of vacation and I checked off the last item on my todo list! I got the car coated in PPG JP205 polyester primer/surfacer. I don't have any experiece with this stuff and it was a bit of a challenge setting up my gun to get it to shoot properly. It is THICK stuff. I bought a gallon and I was planning to use about 3/4 of it. I managed to put the stir stick into the gallon can AFTER I stirred some hardener into a batch in a mixing cup. After that, I figured I better use the whole gallon or it would probably be rock hard the next time I went to use it.

It took me about 8 trips around the car to use up the whole gallon. I think I had the gun set too thin to start with, so I thickend up the mix and I was draining guns in about 10 minutes. I also shot both doors and the deck lid. I was going to shoot the hood too, but I wrapped the edges in packing tape a year or so ago and when I went to take it off, it left adheasive all over the place. I tried to wipe it off with thinner and cleaner, then tried to sand it off and went right through the epoxy... The hood is about 100% so it shouldn't need a bunch of primer/surfacer. I'll probably shoot it with a 2K primer later on.

The whole house stinks like bondo. It's 50 degrees and we have all the windows open. Hopefully it burns off soon!!!

Car in JP 205
Doors in polyester


Saturday, October 30, 2010

Epoxy is on

This was probably the most stressful day in the entire restoration. Paint is always a bit nerve racking for me, but this was over the top. I had a bit of welding and grinding to finish up this morning before I moved to painting.

I hit Home Depot at the crack of 8am for painter's plastic, steel wool, and a couple small items. The plastic I bought was a roll of .35 mil 12'x400' for $24. I also dropped by my dad's house to pick up a box fan. I added a handful of thumb tacks and that was my paint booth for the day. Sorry, I didn't take picks, but it's in my video.

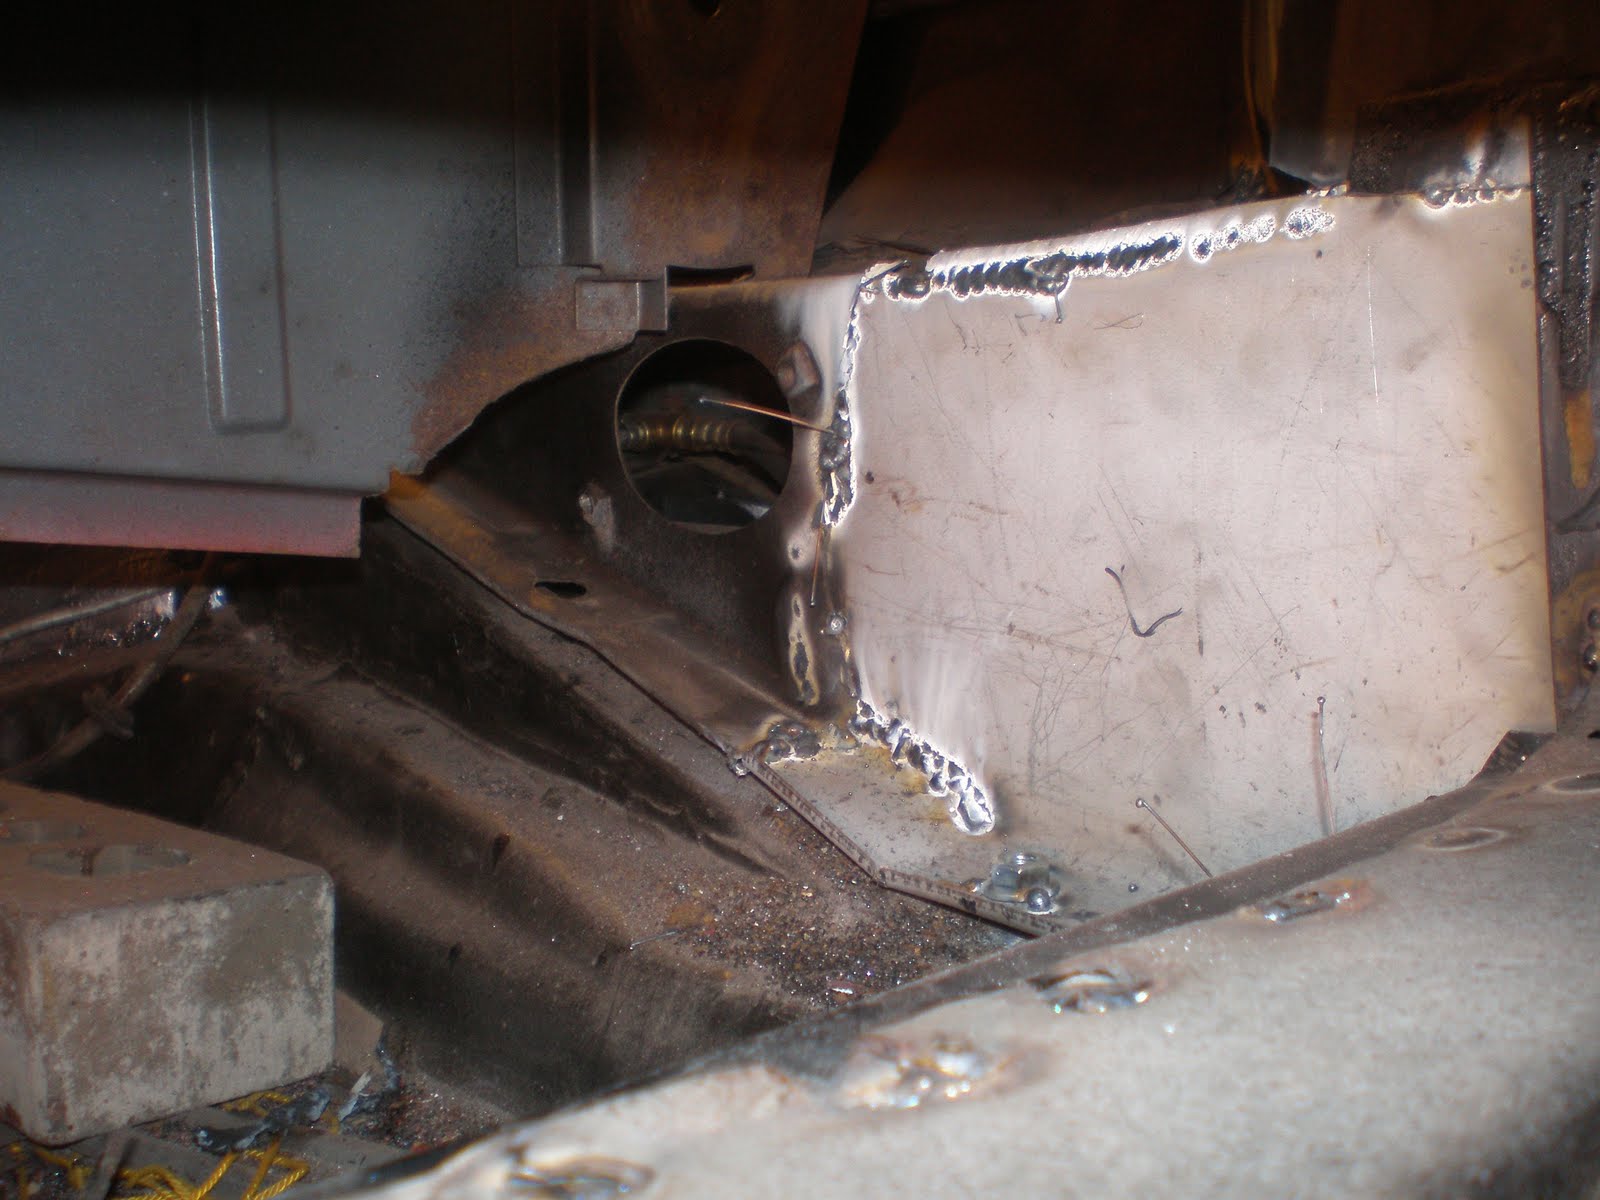
After the Depot, I hit the final wheel arch welds and ground them down. Wouldn't you know it, my welder was very tempermental, and almost pooped on me durning my last few welds. Thankfully, it held out. I was done with the welding and grinding about noon.

I started to DA the entire car thinking it would take about 30 minutes... WOW, that's a huge job. I spent about 2-1/2 hours and went though about 15 discs of 80 grit. When I was done the car looked great. I wire brushed the weatherstrip channels and all the weld beads to make sure I got all the surface rust that was on the car.

After the DA, I hit the whole car with "Pete's Pickle Juice" and steel wool. Pete from Southwest Rod and Custom said that you can buy the metal prep from PPG for about $25 a gallon or you can buy a $2 bottle of white vinegar and add it to water... It's the same thing except for the blue food coloring. The vinegar turns spots on the car a gold color. I suspect it's some sort of impurity, I don't know. I wiped one fender at a time, then rinsed it off with a hose, then dried with paper towels, then hit it with the hose again. I've never done that step before, so I hope I did it right...

Once the car was hosed down and dry, I hit it with Final Prep (wax and grease remover) from Carrol Brothers. It's the same thing as PPG DX 330, but a heck of a lot cheaper. The panels were so clean they actually squeeked as I dragged the Torx paper towels over them.

After the final prep, I pulled the car into the garage and began building the cacoon out of the painter's plastic. Once that was done, I poured a bucket of water on the floor and started the box fan. Then it was time to start mixing paint.

I had two quarts of 402LF and one was no longer a liquid. Apparently, that stuff has a shelf life... The one that was still liquid, was amber in color, which happens with age. I used some DTV reducer and the mix was 2 parts dp90, 1 part 402, .5 parts DTV. This makes a fairly thin sealer that's easier to spray than straight DP. I used a Devilbis Starting Line HVLP gun. This was the first time I really put this gun through the paces.

Once the paint was in the gun (I forgot to strain it, I'll cover that later...) I turned the pressure regulator/valve at the gun to 0, pulled the trigger and slowly opened the regulator until the gun was about 10 PSI. I used a small, round pattern since that seemed to give me a lot of control. The gun performed like a dream! I couldn't believe I was laying paint down that smooth. I did get a couple sags because I lost my concentration for a bit, but all-in-all it looks good. When I got to the end of the first gun full, the paint started to spatter a bit and I couldn't figure out why. It only lasted a little bit and it was time to refill. I refilled and the paint was back to smooth again. At the end of the gun, same spattering... Duh, the paint wasn't strained through the filter... I won't make that mistake again.

I finished cleaning up from the primer/sealer at 7:30p.m.

Things I learned... Give yourself PLENTY of room to work. My cacoon was too small. I needed 2'-3' more room on the sides of the car than what I had. Also, I tripped over the platic in a few places and it came down. There was almost no overspray with the HVLP gun, so not having the plastic wasn't a huge issue. I barely squeezed this job in today and I was hoping to get polyester surfacer on as well... I didn't give myself anywhere near enough time to get everything done, so I was rushed and frustrated by the end of the job. The car is supposed to be a fun project and the stress level today did not make it any fun at all. The results are kick ass though!!!


Rear of the car
Front of car

Nose and doors


Friday, October 29, 2010

Rear Hood gap and apron

BIG DAY TODAY!!! I finished the bodywork on the exterior of the car today! I think I am ready to squirt epoxy tomorrow. I have a few little items to finish up before I do that, but the bulk of the work is complete. Today I welded in the new apron from Mike at House of Ghia. He made special arrangements to have it drop shipped to me from the Ventura Warehouse Group (I think that is KGP&R). It was one of the best quality repops I have received on this project.

I finally conceeded to cutting the right rear quarter at the decklid gap. I really had a bad feeling about this, because the quarter was original and uncut, but in the end, it didn't fit, so something was wrong. After I got everything stitched up, I feel it was probably the best decision I made on the restoration so far. The fit is fantastic now!

Tomorrow I paint!!!

Marking out the lines for surgery

Quarter panel cut and ready to modify
Quarter with nice even gap and everything welded in place


Apron in place and patch fabbed up for the last hole left on the car


Last piece of the body welded into place and ground down.


Wednesday, October 27, 2010

Left Rocker Complete

Spent another day of vacation banging out work on the Karmann Ghia. Today's menu had the left quarter panel lower front section as the blue plate. I spent about 4 hours getting it fit up and welded in. After it was complete, I spent 4 more hours grinding down both quarter patches and stripping some remaining paint from the door jambs, windshield frame and convertible top cable tunnel (the strip around the outside back of the passenger compartment.) All in all I made good progress.

My rear apron did not arrive from House of Ghia today. I spoke with Mike, the owner, last week and he said they were out of stock and he would have one drop shipped from the manufacturer and it was supposed to be here today... Hopefully it will arrive tomorrow or my final weekend of 70 degree temps may pass me by without getting paint on the car. If that happens, I'll have to punt and come up with a backup plan... I don't think the epoxy needs 70 degrees to cure but the polyester surfacer does for sure. I can always fire up the kerosene heater while I'm laying down the surfacer.


Right side quarter patch ground down


Left side patch welded in and dressed

Sunday, October 24, 2010

Right Side Rocker Complete

I got a couple big projects wrapped up today. First I painted the inner fenders with POR-15. That was a much bigger job than I thought it would be. I had to really plan out the attack so I could work myself inside the fenders without getting into areas with wet paint. After a couple hours of squeezing in and out of the fenders I have a pretty good looking set of innards. All I have left to do in front of the doors is a bit of grinding in the luggage compartment and mounting the bumper brackets and tubes.

I broke screw driver #3 trying to remove the last two screws from the passenger door hinge. Thankfully this one had a life time warrenty and I returned it to the Home Depot for a new one. I hit the screws with 2 thick coats of PB Blaster, I guess I'll pull out the torch and see what I can do. I am just afraid of melting a good hinge. I believe they are aluminum, so melting is a big concern.

After I ate lunch and watched the final quarter of the Chiefs game, I set out to weld in the passenger's side front section of the lower rear quarter. These patch panels are notorious for their ill fit. It took just about 5 hours to cut, fit, bully and weld the panel in place. It was about 9 p.m. by the time I cleaned up all the tools, so I did not get the welds ground down. I used SEM brushable weld through primer on all the areas to be welded. I still don't like the way this product makes the welds spatter and the heat that you have to use to burn through it. It's much better than not putting anything there, but I still don't like it. Since it was in the rocker section and I can't get in there to paint AFTER I weld, I don't really have a choice. I have to return to the office tomorrow, and I have to spend Tuesday away from the car as well. Hopefully I can pick up the pace on Wednesday and get a few more items checked off the list so I can get the car in epoxy this weekend.

bumper brackets painted up with POR-15
Bumper tubes. One in gloss black and the other in semi-gloss black. I like the semi-gloss much better.

Lower quarter section welded in


Broken screw driver


Saturday, October 23, 2010

Time for a fake drive

It's been a long week of work and I deviated from the plan a little bit today. I painted up the "new" bumper brackets, bracket tubes, inner quarter patches, door edges and door insides so I while the paint was drying I had an hour or so to do some items that were not on the "do before epoxy primer" list. This last week (in between checking off items), I've been hitting the drivers seat frame with PB blaster to loosen up the controls so I could install the seat and sit in my car for the first time in 15 years. Well, in my little bit of extra time, I set the the seat in place, dug out the steering wheel and column and set up to take a picture of a full grown man in a little vintage VW!!! Hopefully I can finish up the restoration and drive it for real before I loose the rest of my hair!

I'll have more progress pics tomorrow.


Thursday, October 21, 2010

Doors and rear end

I can almost smell the paint! I am trying to figure out what type of paint to use. I already know I am applying PPG DP-90 to the whole car first. Then I am spraying PPG's omni line polyester surfacer so I have a good base to sand on. After that, I've been told I need a 2K primer sealer. I'm not sure about this one, I think Matrix has a good 2K that is cheaper and just as good as PPG. Then I'll have my top coat. I don't know yet whether I need a single stage urethane or a basecoat/clearcoat urethane. I could also do acrylic enamel, but I'm not sure if that is a basecoat/clearcoat. I want to colorsand and buff, so I need the right paint.

I spent yesterday and the day before picking up as many "housekeeping" items as I could on the ghia. I fitted the metal around the Left tail light, I welded up a couple small rust holes, made a couple small patches for rust that was revealed after stripping the paint and I modified the door tops so I can paint them rather than reinstall the black plastic covers that VW put on during the 70's. The top of the door has a bump where the lock button was at one time. In the 70's the lock release was added to the inside handle that opens the door. A few cuts, a minute or two with the hammer, a few cracks with the welder and the door top was smooooooth.

I also stripped the glass, regulators and striker out of the doors. I ground off all the paint on the bottoms of the doors thinking that I would find rust... Thankfully, the first place on the car that was pretty much rust free.


I have a ton of stuff on the agenda today: paint and weld in the front bumper mounts, clean and coat the L hinge pillar, grind, grind, grind, coat the inner doors, cut off the old rear apron (still haven't received my new one from Mike @ HOG.


lock dimple cut, hammered and welded flat (sorry no "after" pic)

Small rust hole welded up

Overall pic of the car. It's been awhile, so I thought I'd show the whole thing.


Tuesday, October 19, 2010

Cleaning the Bumper Mounts

In true Ghia freak fashion, I was giddy as a schoolgirl last Thursday when the receptionist at my firm delivered a little package from the desert to my desk. I knew what was inside and I coaxed a few co-workers into a frenzy when I started telling them that it was the coolest thing they might ever see come out of a USPS box. Frothing at the mouth, they sat and watched me slowly cut open the box, tear through layers of foam padding, and dig down to the precious cargo contained within. Their eyes widend as I revealed a pair of lightly rusted bumper brackets for a 1974 Karmann Ghia... The gasp could have been heard across the street. The looks on their faces was priceless, their dissappointment was tangible. I don't know what they expected. Afterall, I'm a VW guy, what can I say?

Loren from the Samba made me a great deal on these two hard to find puzzle pieces for my car. The ones I removed (shown below) were completely trashed. New ones are $180 per side!!! Loren squared me up for $10 a piece! I spent the first day of my vacation cleaning them and grinding down the light rust that had built up over the last 35 years. I had to cut the tubes out of my old brackets and I still have to strip the coatings off one of them, then I will coat them, inside and out, with POR-15 and mount them on the car. These are the last two pieces of metalwork I need to get welded in on the front of the car.

Loren also did me a huge favor by cutting up a junker intermediate bow for my convertible top. I will use it as a guide when I fabricate my new piece. Thanks Loren!!!

Brackets out of the box and cleaned off
My original equipment... Can you see the holes?

Tubes cut out of the old brackets and getting cleaned up. The brackets are stripped and ready to paint.


Wednesday, October 13, 2010

Left Fender Patch

It's like groundhog day. I did up the left side fender - rear lower section on the ghia today. It took a little less time, but I still have about 3 hours wrapped up in fitting, welding, cussing and beer drinking. The patch was much smaller, but the tab that sticks forward on the heater channel wasn't low enough so I had to weld on a tab to hang down and catch the new fender patch. All in all, I'm very happy with both sides. Next will be the front section of the rear quarters.

Tab welded onto the bottom of the heater channel tab
Panel fitted and clamped for welding

Panel welded in


Tuesday, October 12, 2010

Right Lower Rear Fender Welded On

I feel like the car is really coming together now. I got the skin on the lower right fender welded in today. As repop parts go, this was one of the better parts I've used. I had to do a bit of shrinking on the leading edge and some stretching on the A-Pillar edge, but out of 100 I'd give it a 90+. I still need to go back and grind everything down, but the panel looks and fits great.

If I have some good luck, tomorrow I'll get the same panel welded into the driver's side.

Left side lower fender rear section welded in

Monday, October 11, 2010

Nose Ridge and Lower Fenders

Back in January I made a special tool for reshaping the Nose Ridge Bead on the Ghia.
http://1974kg.blogspot.com/2010/01/right-rear-quarter-finish-up.html
Well, I finally got to use it this past weekend to straighten out the bead. After about a dozen passes with the tool (light rapping on the tool), the ridge looks to be about 99%. There are a couple deep gouges in the bead and some small lumps on the sides that I couldn't get worked out. I am planning to squirt a coat of polyester filler primer on the whole car, and I'll bet that will make the imperfections dissappear. Believe it or not, the inside of the bead looked like brand new. I don't believe anyone but a seasoned body man could tell that this bead has ever been damaged.

This weekend I also was able to grind away the rust on the right A-pillar inside the fender. My grinding tools wouldn't fit all the way back into the crevises, so I took a putty knife and cleaned off all the loose scale. Tonight in the 45 minutes I had from the time I left the office and the time I had to leave for a Board of Alderman meeting, I managed to give the area a good coat of POR-15. Everywhere else on the car, I have made sure I have 100% of the rust off. In this area, I figured, it will never be seen, and the metal is very thick. The good coating of POR should never come loose and hopefully never allow any moisture into the areas that have/had a bit of surface rust left on them.


Hard to photograph, but the nose bead is smooth and consistant
Rust cleaned from the inner lower fender section

Nice coating of POR-15 on the inner fender and the new section of skin. I am going to cut the top of the patch off, so I didn't bother grinding or painting it.


Wednesday, October 6, 2010

Monday, October 4, 2010

Seat Track Repair

I worked a bit tonight on prepping the seat tracks to receive a nice coating of POR-15. I'm hoping to get them painted tomorrow and welded in later in the week. You know what's next... That's right, I'm going to install the seats and steering wheel!!! It will be time to sit in the Ghia for real and see how it feels. I'm going to see if my wife will hop in with me and take a picture. I bet she won't be as excited as I will be.

To fix the track I had to weld a tab on the outer track to complete the flat plate that welds to the floor pan. Also missing was the bump out in the vertical part of the track. Not too big of a job, but it still took two hours to clean them up, fit up the pieces and weld them in.

Patch on the horizontal welded in and patch for the bump out ready to weld.

Bump out patch welded in

Nascar Race Allows Chrome to Shine

I was out at the race track this past weekend watching the Nationwide and Sprint Cup races, so I wasn't able to make any progress on the body of the car. I did, however, manage to take a few pieces of the car to the track that needed some serious attention. I grabbed all the chrome headlight rights and trim along with all my hubcaps. I have chrome from two cars, so I figured I'd polish all if it up and select the best pieces to put back onto my car when the time comes.

It took me about 3 hours (interrupted by watching the race and drinking a few cool ones) to polish up all the chrome. I used 000 (three ought) steel wool to do all the dirty work. I even brought along a few hammers and repaired some dings. To make repairs, I set my dinging spoon upside down on my knee, covered it with a rag (so it wouldn't leave scratches in the chrome) and hammered out dings from the back side.


Not the greatest picture in the world, but you can see an unpolished hubcap on the left (it was too rusted to bother polishing) and compare it to all the others.

Wednesday, September 29, 2010

More Stripping and Cleaning

I continued to strip paint and I hate to say it, but I have quite a bit more to do. I sanded off the rest of the paint on the passenger door skin, hit the rear cowl, and finished off the left rear quarter. I still have a bit to remove on the right rear quarter, a big patch on the driver's door, the windshield frame, engine bay, engine seal channel, door tops, dash, under dash and some spots on the nose. I figure a week's worth of nights or a long weekend of grinding and I'll have the whole car stripped. Every time I turn around it seems like I find another chunk of hidden paint!

I am trying to avoid stripping the inner fenders, but I may wind up doing them anyway. Right now I am planning to just scuff, coat with epoxy and then raptor liner them.

I'll be at the race track this weekend, so I won't make any progress on the body, but I am planning to take a bunch of chrome parts with me so I can buff them up. I'll post pics.

Monday, September 27, 2010

More Paint Stripping

I'm stalling a bit right now. I need a new rear apron because I crushed mine a couple weeks ago. I'm trying to source an original one, vs buying a repop. While I'm hunting that down, there are a few loose ends I am trying to tie up before I get all the welding completed. One of those loose ends is stripping off the remaining paint. On this project I've used a sandblaster, chemicals, and a DA with 24, 50 and 80 grit papers. I can officially say, no matter what you use, removing paint from a car is a long, difficult process.

The chemical strippers seem like they would be a dream, but the truth is, this car has 4-5 layers of paint on it. Every layer you strip off requires scraping with a putty knife before the paint starts to harden up. After 5 layers of chemicals, I realize it takes just as long as when I use the DA...

That said, I used a combo of chemicals and DA over the weekend to get the skin on right side of the car almost completely stripped. Tonight I used a DA with 50 grit to do the same areas on the driver's side. Both side took me over 3 hours each. If I had a better compressor, I could probably cut the time by 1/2. I run my DA at 75 psi because any more than that I have to stop every ten minutes because it dips to about 40 psi. If I run lower than 75, I might as well sand it by hand. I've also tried my 2" and 3" die grinders and variouse other abrasives... All take about the same amount of time.

I still have the engine bay and a few small spots around the car to strip, but I am getting very close to complete. Hopefully I'll find some time this week to sand blast the lower inner fender areas and get them in POR 15 so I can well on the fender skins. I also spent time tonight scrapping off 35 years of crud from the right front wheel well.

In the past couple weeks I have also focused my overall approach for the paint. I am going to use U-Pol tintable Raptor bed liner for all four wheel wells and the area under the engine bay and luggage area as well as the front "fire wall" area. The actually front trunk area may or may not get nice paint vs bed liner. The nice thing about the Raptor is you can add urethane paint to it and color match your car.

I believe I may have also found a color for the car. I wanted to do Lizard Green, which is an old 50s-60s VW color, but I may have found a better color. The new beetles have a color called Gecko Green Metalic. I saw one drive by the other day and realized that might be a nice color for my Ghia. I suspect it's also easier to get ahold of someone who can mix it properly. I've seen some bad mixes of old colors before. Does Gecko=Lizard??? I'll have to get a test panel done and find out.

If I can pin down the exterior color, I will then decide what flavor of Haartz canvas to go with. I will be ordering swatches in the next few weeks to help make the decision.
right side after a couple layers have been chemically peeled
right side after chemicals and 80 grit on a DA


Left side mid-strip. It was too dark for pics when I wrapped up tonight.


Wednesday, September 15, 2010

Progress from Brian's and Beyond

I can tell the weather has finally broken. I have the itch to work on the car constantly now! I promised some pics of the progress we made last week and they are at the bottom of this post. I can't tell you how much the use of Brian's lift helped in pushing the project closer to completion. I am claiming that last week embodied a year's worth of work. We raised and lowered the body no fewer than 20 times. When I do that at home it takes a few helpers to remove it, then a few helpers to put it back onto the chassis. Usually there is about 3-4 days between lifting and replacing. We could do it in 30 seconds at Brian's... I CAN'T THANK BRIAN ENOUGH!!!
Tonight I worked on painting up the headlight buckets I blasted last night. Out of 4 buckets, I came up with 2 good sets of parts! I had a few issues removing a couple of the screws, but all is well. The blasting yielded 95% clean metal (forgot to take photo) and I coated with POR15. I will weld the jack mounts on tomorrow night over at Brian's.
I bought rubber body bushings for the trailing arm/shock tower, front axle mount and area under the luggage compartment where it mounts to the frame. The new bushings are incredibly stiff and the old ones are very spongy. This is causing the door gaps to close at the rear of the door and it's causing the lower rear corner of the door to dip down. I am planning to put the old bushings in tomorrow night while I have access to the lift to see if that solves the problem. I have a feeling it will. If it works, I can either machine down the new bushings or just use the old ones. I bet the coupes have enough rigidity that it doesn't matter a whole lot. The verts on the other hand are very sensitive!

I forgot to take pics of the dog leg assembly, but it's in the tail end of this vid: http://www.youtube.com/watch?v=hAIn4VHMTtA


Right side dog leg welded in. Also new bottom of fender well support, A-Pillar support and cap on the end of the rocker skin.


Left side crossmember support removed. Also removed a chunk of the wheel well above the trailing arm.


crossmember support patch welded and bottom of wheel well patched up


view of crossmember looking in from above rocker panel looking toward rear of the car. You can see the flange nut welded to the patch.


Grandpa Cecil fitting up the patch panel for the right side crossmember support


Right side crossmember support panel welded in

Right side wheel well patches welded in

Jack mounts. Left is the condition they were in when we took them off the car. The right one has been sand blasted.


Headlight buckets and jack mounts after a coating of POR 15


Headlight buckets with POR 15 applied.

Tuesday, September 14, 2010

Work week complete but car not coming home

I am officially back to the office after a week's worth of tearing through the KG project. We really got a ton accomplished:

Filled in holes in wheel well to luggage compartment
Welded in plates on shock mount
Fabbed and welded in RT dogleg
Fabbed and welded A-Pillar support
Fabbed and installed tranny linkage cover plate (was missing)
Drilled pan holes
Bolted down body
Fabbed and welded in crossmember to pan supports
Welded engine bay support pieces
Stripped seatbelt nuts off old pan, cleaned and welded onto new pan
Stripped jack mounts off old pan (ready to be blasted and welded on

The car is still at the shop, so hopefully I can knock out a few smaller projects this week. On the list:
Blast headlight buckets
Blast LT heat exchanger
Finish "tubbing" the wheel wells to fit the 60's engine bay
Grind all the unfinished welds
Drill holes for crossmember fastener
Blast and weld in seat tracks

Pictures to come.

Thursday, September 9, 2010

Ghia moved to a bigger shop for a week

This week has been another to mark on the calendar for progress on the Ghia. My friend Brian offered the use of his shop to me. He has a large garage with high ceilings and a car lift. The shop also comes with Brian's expert advice and on more than one occasion, the use of his highly skilled hands.

I towed the car over to his house on Thursday last week and we set the car up on the lift. With family in town and a few birthdays to celebrate, the car had to wait until Monday evening before I started to work on it. I had a week's worth of vacation I needed to use or loose, so I decided this week would be the "haul ass" on the Karmann Ghia week.

Before heading over to Brian's to get cracking, I wrote out a list of the jobs and the priority of those jobs, knowing, that I need to get everything done on the lift that requires lifting... At home I have a cherry picker, but that's not anywhere near as handy as a lift.

Priority number 1: get the rockers fully welded and complete... Sounds simple, but I've spent 3 days working on bracing up the doors (see pic for the "adjust-a-brace"), welding all the seams, adjusted the warped skins (from the repop factory, not from welding), filling gaps and grinding down the welds. At the end of the day today, the door gaps held when we removed the adjuster clamps on the door braces. I think that means we are done with the rockers. Now they just need to have the welds ground down for finishing.

Priority number 2: Grind hard to reach places that are easier to get to while standing. My wife's grandpa came and helped on Wednesday. He got in and ground down the back sides of the headlight skins, and the bumper bracket mounting points. I know he did more than that, but that's what I saw.

Priority number 3: weld up the holes in the wheel wells. This is going to happen tomorrow. I think we can knock out both sides in one day. If not, we will hit it over the weekend.


car on the tow bar in Brian's driveway
car situated on the lift

rocker panel after the bow was taken out

door brace with striker side adjustment (very handy for setting gaps)

grandpa Cecil working the grinder

Headlight bucket welded in