Tuesday, December 23, 2008

Moving forward

Over the past couple days I have been working to get the car ready to have both ends of the driver's side rockers welded up. I worked on the lip of the passenger side pans so the passenger side would sit correctly. I welded in a brace from the dash to the cv top frame connection point behind and inside of the driver's door opening so I could take out my door brace. Amazingly, the brace was perfectly snug when I removed it. That means the geometry of the opening did not change during the lifting, moving etc!


I reattached the drivers door to work on getting all the gaps correct. It took about 30 minutes to get everything close to where it should be. I need to insert the rubber shims at "point A" on the shock towers (both sides) to get the b pillar gap parallel to the edge of the door. I am hoping to get this done over the xmas holiday. I will also reattach the top frame before I do my welding. I want to be certain that everything fits perfectly before I make my repairs permanent!


Pics to follow

Thursday, December 11, 2008

THAT JUST HAPPEND!!!

I FINALLY got my first rocker welded in tonight. It's been a project 5 years in the making. I posted pics of my rocker removal on my old website somewhere around this time in 2003! I am glad I took the time to figure it all out and do it right. There were lots of measurements that needed to be correct and it's always better to back off and think before you fuse two pieces of metal together forever.


Here is the play by play: I called up my wife's Uncle Scott to see if he could help me out for a couple hours. I needed an extra set of hands, but I also needed an extra brain to help think through the challenges. Scott and I have done construction projects, brake jobs and weird projects together over the years, so I knew he was on the same wavelength... The stars were aligned and he didn't have any hockey games or dance recitals with the kids so he was able to help...


I put the skin in years ago (see my old website at the bottom of the blog) so I knew it was in the right spot. We fit up the stiffener after I had butchered up the top and bottom tabs to fit around the dents in the rocker skin. I tacked the two ends and the middle of the stiffener while the body was down on the pans. Then we lifted the back end and put a brick under the place where the rear seat touches the tranny tunnel. This gave enough clearance to set the inner rocker in place. We clamped the inner rocker in place, then pulled out the brick and set the car back down on the pans. I clamped the bottom edge of the rocker together and everthing lined up and looked perfect (seriously, less than a 1/16 of an inch off.) Since everything was good, I unclamped the inner rocker and we lifted the body back up... I pulled out the brick and we set the car back down. I then welded the bottom lip of the stiffener to the skin (see pic, then I laid down inside the car and welded the top lip to the skin (easier said than done.) Once the stiffener was solid, we picked the car back up and reinserted the brick, fit the inner rocker, then set the car back down again. We realized we needed to poke holes at the bottom of the skin for the plug welds, so we picked the car up again, removed the inner rocker and poked holes every inch and a half (yes we measured them so they'd be uniform.) Then we put the inner rocker back in, clamped it and lowered the body. I filled all the plug welds on the top lip (see pic). We then had a couple beers and I still haven't wiped the smile off my face!!!


I will fill in the plug welds on the bottom lip of the rocker this weekend, then mount the driver's side door to make sure the gaps are correct.

Final with inner rocker (heater channel)

Stiffener welded in


Just the skin


Tuesday, December 9, 2008

Body finally meets chassis

I have been off the ghia for awhile. My aquaintance (the guy with the auto lift and huge workshop) and I never hooked up over the summer to work on the rockers. He is working on a cobra kit with his brother and he has been waist deep in that project since I asked about using his lift. I don't like to impose so I conceived and I am moving forward with plan B. It took awhile to figure out just how to be able to lift the body without a car lift. Thankfully, I have some thoughtful relatives!

My wife's grandfather lent me his cherry picker and two vehicle dollies. I bought two other dollies ($50 on sale at HF) so I have all four wheels with casters under them. I had 5 guys over on Sunday and we lifted the body off my cart and put it onto the rebuilt chassis. Hopefully with the cherry picker, I can lift the body from the front enough to get rocker pieces and parts in, set it back down for a fit and tack, then lift back up for finish welding.

I spent this evening grinding the edges of the new floor pans back so only a 1/4" lip sticks out. The pans had anywhere from 1/4" to over 3/4" of metal sticking out. The driver's side is ready to go now.

It actually sort of resembles a car again!
Chassis and body apart.

Sunday, July 27, 2008

Engine Bay Patch Up

When my new engine bay arrived from California, I noticed that the saws-all bit a little bit deeper into the vertical panel that sits over the back of the engine. I decided to fix this before the sheet metal gets blasted.
All clamped up and ready to weld
All the welding is done and I have 1/2 of it ground down
welding and grinding complete
I also had a stiffener panel made this week to replace one that I totally hacked up. It cost me $30 to have it fabbed up. Much better than buying one new. I don't have the fancy indentions in this one, but I don't think they are really that useful anyway.

Monday, July 21, 2008

Blasted Right Rear Wheel Well

I managed to get a bit of work done this weekend. I blasted the right rear wheel well. It wasn't as bad as I thought it would be. There is a fair amount of patching to be done, but nothing outragous. Does anyone know what the 2 studs on the left of the indention are for? It looks like a flange for an exhaust, but I know it's not for that. On the other side it's slightly different.

I also received my engine bay today. I'll be blasting that soon and giving it a coat of sealer. I probably won't install it until I get the rocker sections taken care of.

Sunday, July 13, 2008

Blasting Hood

I blasted the rest of the engine cover this weekend. It took about 2 hours to blast and about 100 lbs of media. I wound up reusing some of the media toward the end and it worked o.k. I have been told that slag only works once. It seemed to be just fine the second time around. I figured out that when the pressure drops at the pot, the blasting efficiency goes south pretty quickly. I spent quite a bit of time waiting for my 5hp 60gal blackmax to "catch up."

Bottom of hood blasted

Body side of hood blasted

Hood in DP90

Monday, July 7, 2008

More Blasting

I started blasting the rear hood this evening. It's about 95F during the day, so I waited until the sun went down. I blasted for about 30 minutes and I was able to get about 3/4 of the inside of the hood done. I'll get the outside skin cleaned up tomorrow. It should go much faster since it doesn't have all the detail of the inside. I should be able to get it sealed in DP90 as well. I'll post some pics after blasting and after painting.

Thursday, July 3, 2008

Sheet Metal Bought

I purchased a rear clip from someone in CA. They are going to butcher it for me and send out the engine bay and hopefully the wheel wells. I bought a repro center engine bay and it's nice, but the lines are not crisp like the ones from the factory. I think of the engine bay as kind of a jewelry box for the engine. Hopefully this purchase will put my T1 engine on 'display' under the rear decklid!!!

A little sandblasting and it should clean up nicely.

Color Concept ???

Concept "artwork"
Photo of a '57 with the green I am thinking about using

I butchered up someone's photo of a 74 vert so I could consider options for color and finish. I am smoothing the front grills and stripping the trim from the lower door area. I am also planning on kicking the plastic on the top of the doors so they will look more vintage. The dash pad may or may not stay, but I'll be smoothing out all the holes in the face. I am not replacing the lower dash pad.

The green is supposed to be from a 50's era ghia (see second photo). I'll have to look up the color, but I have seen a few pics online of 50's cars that have this color.

Interior will be white or ivory with trim accents to match the paint. I am planning on a light colored top. I love Foose's use of two tone on his cars, so there might be ivory paint on the interior instead of carrying the green all the way through. I think that might be a nice touch.

I'll have other sketches later on down the line.

Sunday, June 29, 2008

Blasting the rear interior

Over the weekend I decided to sandblast the rear package area of the Ghia. It was pretty gnarley back there and I wanted more practice with the pressure blaster now that I know how to use it. I got the best results with the regulator set around 50PSI. I again was using fine grit black beauty. I rolled the car into the driveway (neighbors LOVED that) and I covered the interior up with a large tarp. My car is on a dolly, so I have plentey of room to get "inside" it from underneath the dolly. The tarp helped keep the media contained to a really small area. When I do the rest of the body, I'll be tarping areas to keep clean up nice and simple. I spent about 3 hours on Saturday and another 3 hours on Sunday. A fair amount of the time was to get things set up and get the blaster loaded. I went through 250 lbs of media
Package area before the blast

Driver's side fender well

About 1/2 way through (end of Saturday)

I forgot to take a pic when I finished blasting, so here is the interior in DP90 sealer

Another shot of the area in sealer. I see a spot I missed.

Tuesday, June 24, 2008

Sandblasting Heat Exchanger

I finally found some time to try out the pointers Brian gave me on my sandblaster. I throttled down the media supply and let it rip on one of my heat exchangers. I also bought some high temp paint (500F) so I could paint the exchanger right after I blasted it.


I used black beauty slag from Reed Materials. It took about 1/2 a bag (50lbs) and about 1/2 an hour to get the part clean enough for paint.
Right and left heat exchangers before blasting

Left exchangers after media blasting


Left exchanger in high temp primer

Left exchanger in high temp Detroit Diesel Green Paint. Much better than the rusted out P.O.S. in the first pic!

Thursday, June 19, 2008

Rotisserie Under Way

I scavenged a few pieces of 1/4" thick 2.5"x2.5" square tube to make the pieces and parts for my rotisserie. Last night I welded up the main uprights and tonight I'll make the outriggers. I am going to make the outriggers bolt on so I can break the contraption down and store it under my truck in the garage.

Small bits of progress, but I feel this time will pay huge dividends when I sandblast and start to fix holes on the bottom side of the car.

Tuesday, June 17, 2008

Project moving along again

I haven't got any new pics to post, but I have some progress to report. I have re-established contact with a fellow car buff who has offered to assist me in getting my rockers fitted up. He has a lift in his garage we are going to use to get the heater channels fit correctly. I am going to take the body and chassis over to his house, we will use his lift like a fork lift and seperate and mate the body as many times as it takes for everything to fit. We are tentatively scheduled for 3 weekends from now.

In the mean time, I am preping the car a bit and building a rotisserie. I made up the front and back skewers this evening out of some angle iron and the tubes out of a trashed front beam. I am expecting some 2-1/2" square tubing to come my way early next week. I will make the bottom of the rotisserie when that arrives. After we get the rockers fit up, I am going to mount the car to the rotisserie and bring it back home.

I also received a lesson in how to 'tune in' my sandblaster. I gave up on it last year when it took about 4 hours to blast an area the size of a butter tub. I found out one of the valves needs to run at 50% instead of 100%. The full open position causes too much media to clog the feed tube and then everything surges instead of running smoothly. After we get the rockers in, I plan on a full-on sandblasting.

I'll post pics of the rotisserie when I get it built.

Sunday, February 10, 2008

Heater Channel Fit Up

I got smart this w/e and cut the left side off my extra chassis and used it as a jig to get my new heater channel and floor to fender well support fitted up properly to the body.


I also bought an 8mm 1.25 pitch tap and a 10mm (can't remember the pitch) at Car Quest. I have been looking at tool stores for metric taps for awhile and could not find any. I used the taps to chase all the bolt holes on the new heater channels. I also bought a dozen 8mm bolts to use for the jig.
This is a view of the left side of my rotted out chassis (yes it is THAT BAD) bolted to the new heater channels.
The inner rear wheel housing comes out of the box with 2 seams that need to be welded up. I was looking for something a little les s thought provoking to work on, so I stitched it up.
This is the whole heater channel and fender well to floor dog leg assembly clamped into place and fitted up. I still have a bit of work to do to get the convertible stiffener buttoned up inside the rocker skin, so these pieces will go on and off another half dozen times before I start welding them up permanently.


The green car is from someone's ebay listing. The car is in bad shape, but the top is folding properly. I am posting this for a guy on the airheadparts.com forum

Don't know if you can see the detail or not, but the red arrow is pointing toward the skinny piece that often gets bent when someone sits on the apron right in front of the engine cover. It already has a bend in it and if it gets messed up it prevents the top from closing properly.

Sunday, February 3, 2008

Fender to Well Part II

Today I made and installed a patch panel to replace the rotted out section below the bend in the fender well. The piece is about 2-3/4" tall. It took about 4 hours to fit, weld and grind this piece.
This is a pic from inside the front driver's side wheel opening. It is of the patch and the fender well after I ground everything down to fit.
From the wheel opening again after welding and grinding
From inside the passenger compartment after grinding and welding.

Saturday, February 2, 2008

Fender Well Supports

I cut out some rot and cut this patch to fit. This is on the driver's side at the front end of the dogleg. This should give me a solid welding point for that end of the floor to fender well piece. I'll be welding on a 4" patch all the way around the curved piece to the right of this.

I used the old floor to fender well support to make a cardboard template of the bottom plate that attaches to the pan. I stabbed holes in the template where the bolt holes were so everything should line up. I built a cage for the regtangular floating double nut at the front end of the plate. I also traced the old piece to make a patch that I welded into the front of the dog leg piece (left side of the picture). This wound up a very smart thing because the dog leg didn't match the template and I had to do some reshaping. After the reshaping, everything fit really well. I used M8 flange nuts to weld on. They tend to be easier to weld then standard hex nuts.

Thursday, January 31, 2008

Floor Pan End Game

Here are a couple photos of the chassis getting completed. I have the trans in now, all the brake lines run and everything is complete. I can't find the pics of it just yet.

This is the Cassis with seam sealer prior to POR-15.

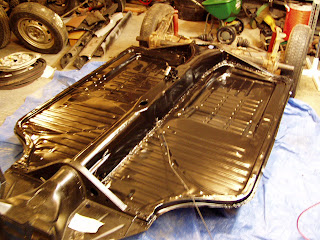
This is the chassis after paint. I painted the rear as well, but don't have the pics.

Stuff already posted elsewhere

I have a handfull of pictures and descriptions of work I have already done on my old website:

http://home.roadrunner.com/~porterartistry

I will be rounding all that stuff up at some point and posting it here so everything is in the same place.